Batch Auto Alignment of Stereo Pairs
SPM uses data provided by third-party software that embodies a method for which the following patent has been issued:
"Method and apparatus for identifying scale invariant features in an image and use of same for locating an object in an image,"
David G. Lowe, US Patent 6,711,293 (March 23, 2004).
Provisional application filed March 8, 1999. Asignee: The University of British Columbia
IMPORTANT NOTE: SPM 4.0 and later has the option of internal code for feature-detection that is not based on SIFT.
This code is faster than SIFT and new users of SPM do not need to install Autopano or Autopano-sift as described below.
Auto alignment using SPM's internal code for feature detection
In Edit\Preferences\Adjust, clear the entry that specifies the location of Autopano.
SPM will enter 'Internal code' into that box.
You should still set the options for parallel\crossed images and how you want the images mounted to the window.
Using Autopano or Autopano-sift for feature detection (legacy methods)
You should have already installed Autopano-SIFT or Autopano and, if necessary, the .NET framework.
If you wish to include them in the batch-processing, the following need to have been determined or set :-
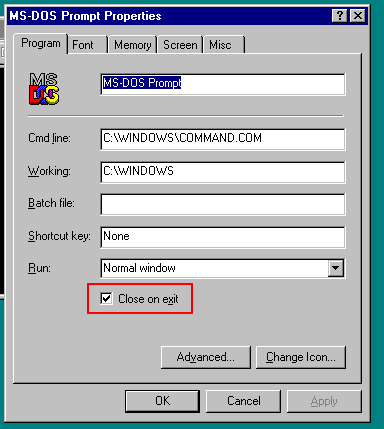
If you are using Win98, right-click on a DOS window and set the option to close on exit as shown above.
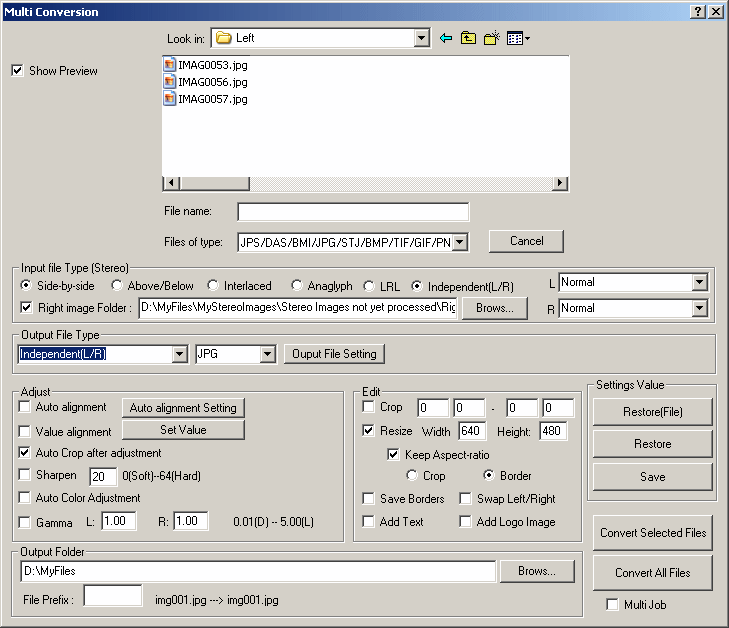
Select MultiConversion and browse to your source-image folder or folders.
Select your options under 'Input file Type (Stereo)', 'Output File Type' and 'Edit'.
These are all explained in 'MultiConversion'.
Select the destination of your output folder and any file prefix, check 'Auto alignment (autopano)' and click 'Auto alignment Setting'.
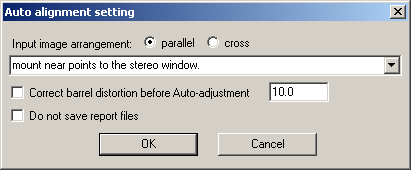
SPM needs to know which image is left and which is right.
Depending upon your Preference\Adjust\Autopano Folder settings, Autopano or Autopano-SIFT will be used to detect image keypoints.
If report files are not saved, they will not be available for use by auto-alignment or EasyAdjustment.
For highest image quality, you can set 'Only horizontal and vertical alignment'in Edit/Preferences/Adjustment.
It will depend on the accuracy of your rig if you can use this.

Referring to the options in the above drop-down menu :-
1. Regardless of disparity, near point is mounted to window.
Far points may have excessive disparity.
2. If disparity is less than 1/25th image-width, near point is mounted to the window.
The far-points will have a 'comfortable' disparity.
If disparity is greater than 1/25th, near points will come through the window but far points are comfortably viewed.
3. No adjustment of the stereo window.
If you use Multiconversion with auto cropping ON, the image width will be cropped.
If you use this option, you can get maximum image width. and then adjust the window manually.
4. Input the deviation.
You may set the maximum deviation of the far points as a decimal percentage of image-width.
For viewing on a computer monitor, 5% (1/20) or more may be acceptable.

All of the above information may be saved in a named-file by clicking 'Save'.
In this way, future batch-operations may not need selection of any parameters other than the input folder or folders.
The text, borders, spaces and logo to be applied will be as saved in the MCV file (as will the current registry values).
You can customise the MCV file for different purposes and although that can be done by manually-editing the file,
the preferrred method is to make changes with SPM and save the new settings.
For future batch operations, you may simply need to click 'Restore(File)' to load all your preferred settings.
As explained in 'MultiConversion', you now 'Convert Selected Files' or 'Convert All Files'.
SPM makes different assumptions about filenames in each case.
Maximum image width and/or height should not exceed 16,383 pixels.
Your images will now be corrected, mounted to the window and have text, borders, spaces and logo added if required.
If you wish to hide the DOS (Autopano)window, select that option in Preferences/Adjust.
If you wish to make small adjustments to the window position (and have saved the report file), follow this procedure.