| 1. Video functions are available in Menu->File->Movie/Image sequence. The following is a sequential explanation. 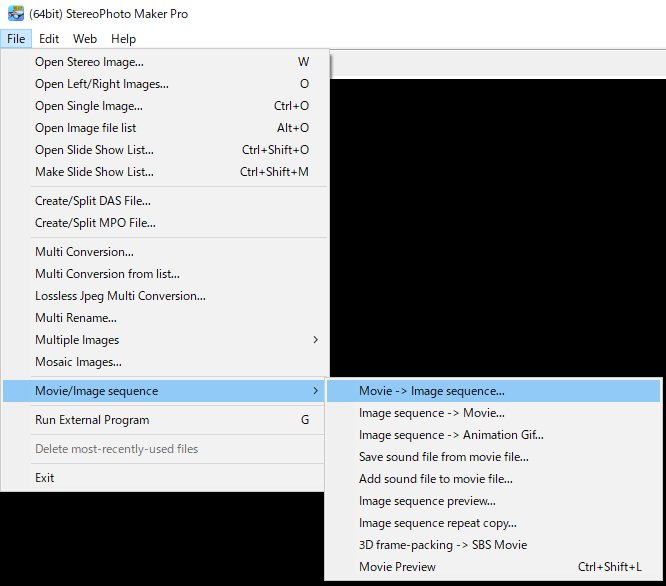 |
| 2. Movie -> Image sequence... Export each frame of the video to a sequential numbered still image (jpg). You can specify a video file that is supported by ffmpeg.exe. Select the video, specify the destination folder and, if necessary, prefix the output sequential still image. Finally, Press the "Start Creating" button. If the process ends in a moment and the output sequential still image is not created, some error has occurred. If you check the "pause after ffmpeg function for debug" checkbox and press the "Start Creating" button again. You can check the error display. 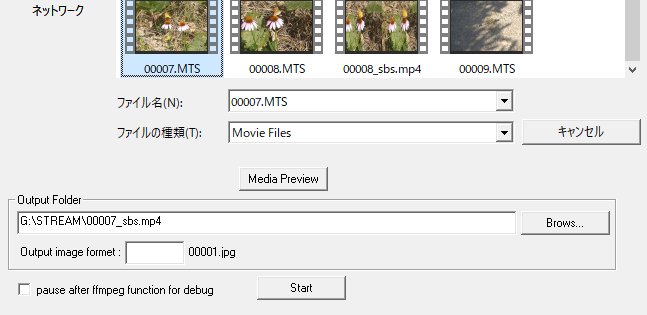 |
| 3. Image sequence -> Movie... Converts a sequential numbered still image to a video. The selected image is the first frame, and the sequential number is exported to a movie. Note that the conversion stops when the sequential number is interrupted. You can specify the output video format by its extension. For example, .mp4 .gif (animation GIF) Specifies the frame rate. If you want to resize the original image, enter the frame size. A value of "0" will not resize the image. If you enter either the width or the height, the image will be resized to match the width and the aspect ratio of the input image. When "Preview after saving" is checked, the video will be played back automatically after creating the video. 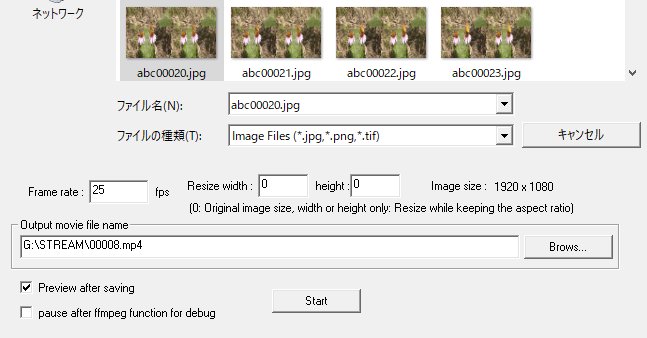 |
| 4. Image sequence -> Animation Gif... Create an animated GIF. You can use ffmpeg.exe to create an animated GIF by setting the extension to .gif in "Image sequence -> Movie" above. You can also create animated GIF in this menu, this function does not use ffmpeg.exe. The advantage is the color reproducibility is high, but it takes a long time to process. VGA (640x480) size is recommended that you use this function. 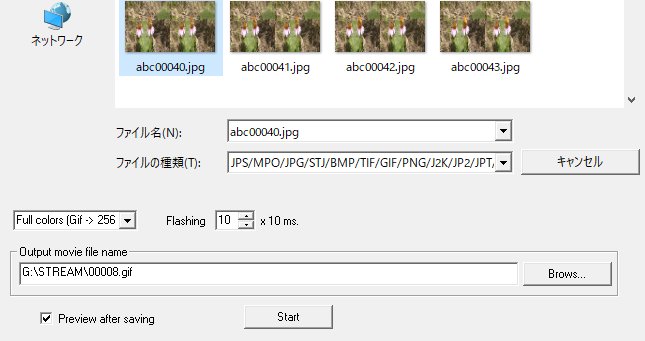 |
| 5. Save sound file from movie file... Extract audio from a video file and export it in .mp3 or .wav format. You can specify the number of seconds from the beginning of the video to be extracted. If you want to cut the beginning of the frame of the video, you can cut the frame number to match the frame rate. The number of frames and this number of seconds must be matched. Example. If you want to cut the first 5 seconds at 30 fps Video frames are cut to 30x5=150 frames and Audio is extracted from 5 seconds later, and later, when combined, the sound and video match.  |
| 6. Add sound file to movie file... Combines video and audio files without audio. If you check "Use shortest duration" option, you can combine video and audio files to short side. 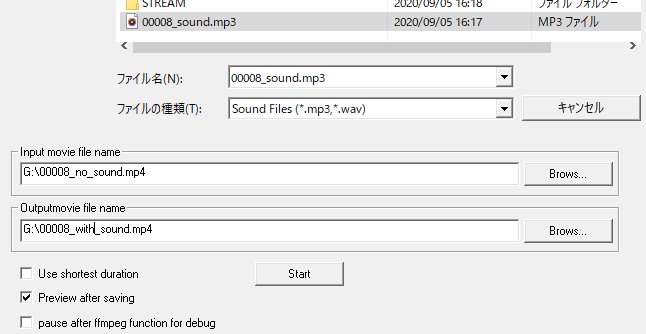 |
| 7. Image sequence preview... It playback from the specified still image as if it were an animation. It takes a long time to process, so it might be faster to convert to video. 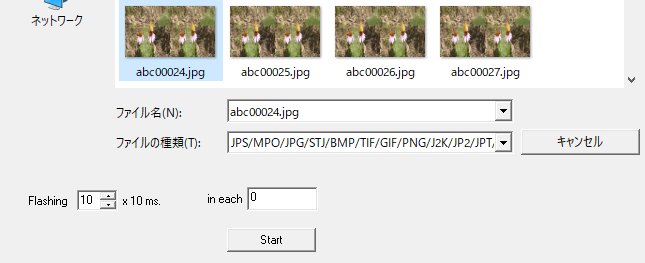 |
| 8. Image sequence repeat copy... Repeats the specified number of times and makes a sequential number. If this option is selected once, no action is taken. If this option is selected twice, the image is copied once to repeat twice. When [1->n->1] is checked, it copies round trip and makes into a sequential number. When the number of times of specification 2 times, it makes a copy and numbering two times round trip, and it makes a copy and numbering sequentially. 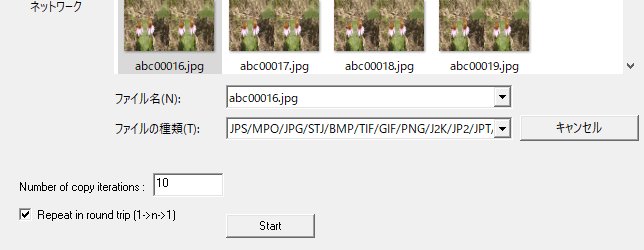 |
| 9. 3D frame-packing -> SBS Movie Convert from frame-packed 3D video (3D video output of Panasonic 3D1 (.MTS) or Youtube 3D video,etc) to SBS-format 3D video. It does not re-encode and converts fast. When you check "Preview after saving", the video will be played back automatically after creating the SBS video. 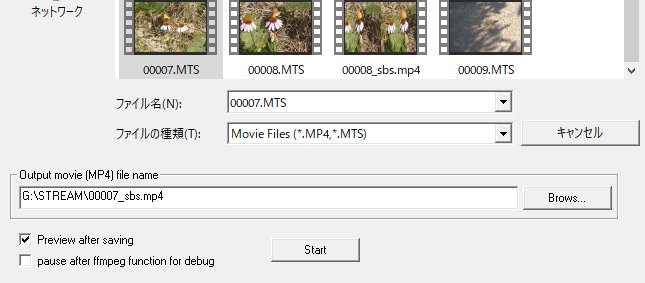 |
| 10. Movie Preview The video player will be launched. First, play in a simple video player and press the top button according to the 3D format of the video. Switch to playback on a dedicated 3D movie player. Press the Enter key to view the full screen. Press the Enter key again or press the Esc key to return to the previous screen.  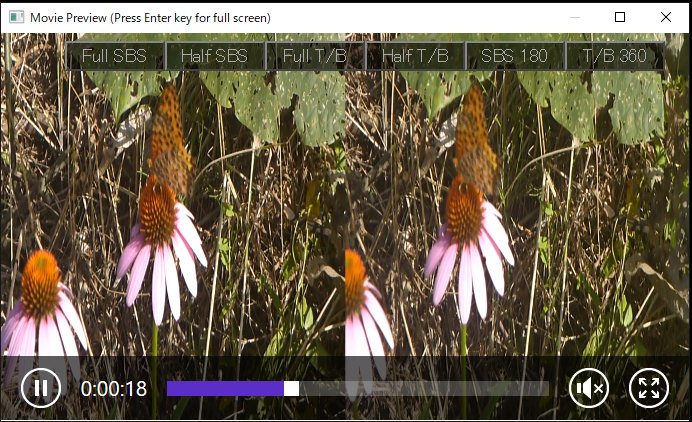 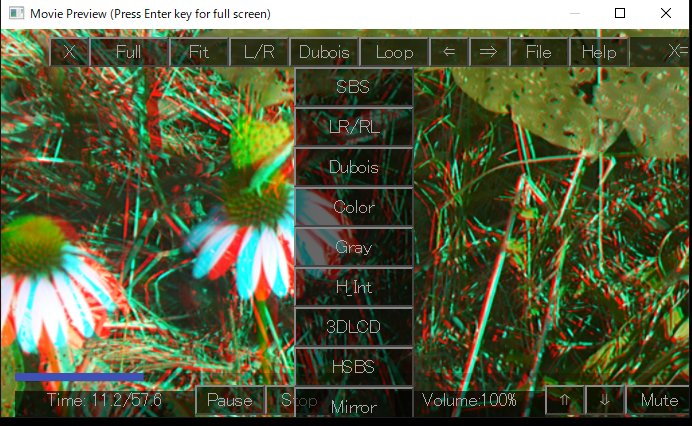 |
| 11. drag and drop video files Drag and drop a video file onto the SPM icon or into the SPM window, you'll see a same as the video preview above, you can play it in a simple video player. Press the button at the top to switch to playback on a dedicated 3D movie player. |