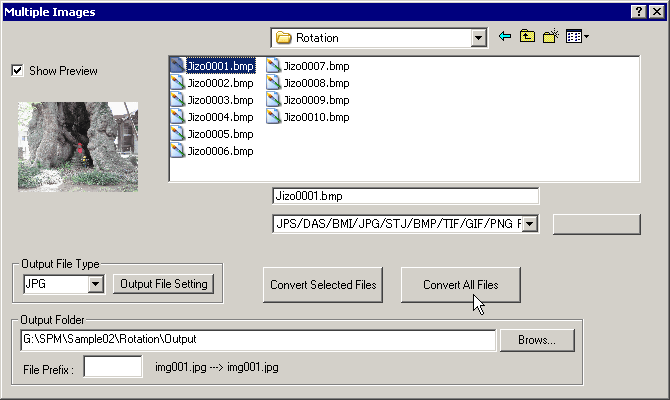
Choose options (Output File Type,etc...).
Enter the Output folder name (if it does not exist, SPM can optionally create it).
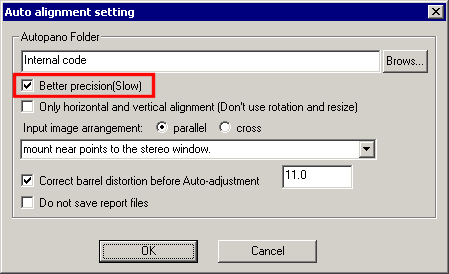
Press 'Auto alignment Setting', then check 'Better precision(Slow)' option.
If your image sequence is captured by moving from left to right, then input-image arrangement is parallel.
If you want to make 360 degree images,you can try this with sample04.
Sample04 can take a considerable amount of time on older computers, maybe two hours.
For 360 degree images, make absolutely sure that you have checked 'Keep last image and take average'.
It may be necessary to check 'Keep last image and take average' for other image-sequences if the viewpoint change between images is large.
 ....
....
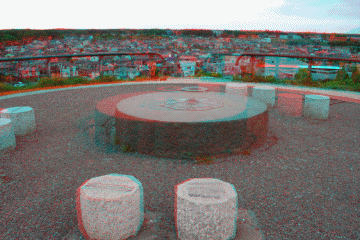
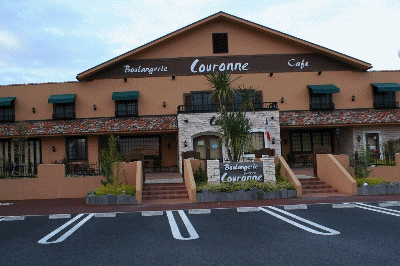
The above example on the left, is with the option unchecked and the perspective change of the building does not look correct.
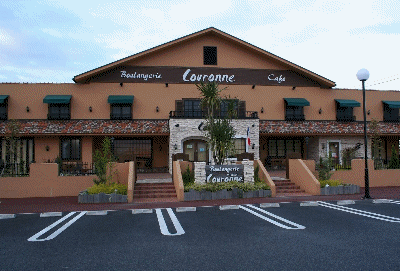
In the example on the right the option is checked and the right side of the building appears to rotate towards you in the correct manner as you move from left-to-right.
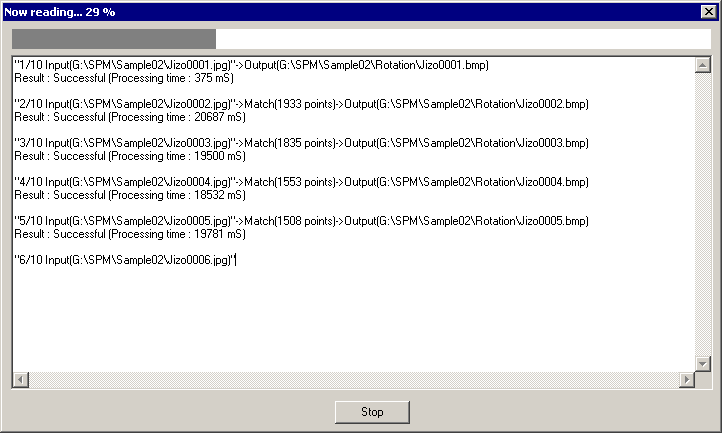
Press 'Convert all files' or select the input files and then press 'Convert Selected Files'.

For each image, the processing time will be reported (if alignment was successful) together with total-processing time.
A CSV (comma-separated variables) file with alignment information is also saved in the Output folder and may be optionally used by SPM in repeat operations with the same set of images.
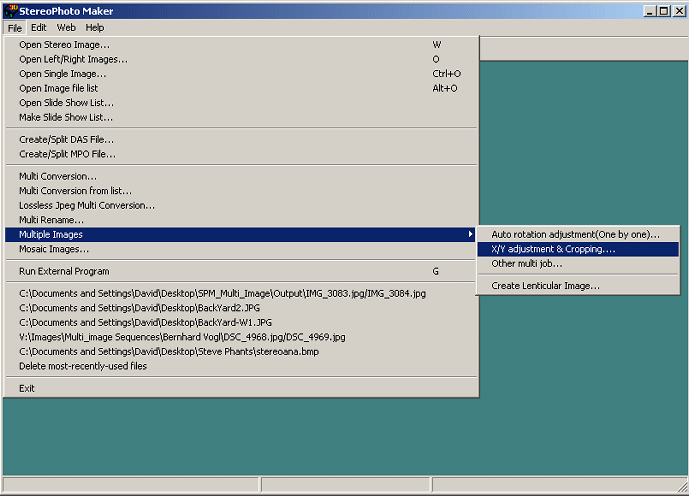
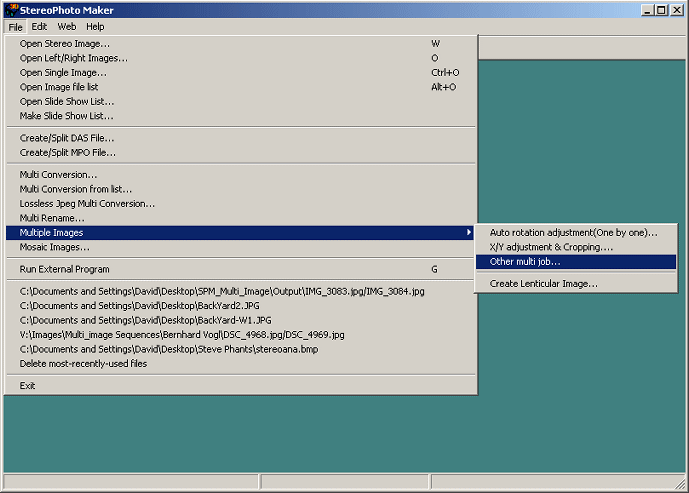
Next, select Menu->File->Multiple Images->X/Y adjustment & Cropping...
Choose options (Output File Type,etc...).
Input the Output folder name.
Make sure that you enter a different folder name than used for your source or first-stage processed images to avoid overwriting !
Select input files which were adjusted in the above process, then push the convert button.
To view the alignment before X/Y adjustment and cropping is carried-out,press '100% Size' and then 'Test' to toggle an animation on/off.
The title bar will indicate that test images are being created.
The first step is to accurately specify common corresponding points of all images'.

You can scroll the image position with mouth drag.
Select a prominent, easily-recognised feature that is visible in all images to use as the common corresponding point.
(For sample04, that will be the tip of the cone on the dial-plate)
It is recommended that you set '100% Size' for good precision.

Push 'Set Point' button, then click mouse left button on the common corresponding points when they are exactly under the cross-hair.
After clicking the mouse button, SPM changes to the next image, so continue to specify common corresponding points for all images.
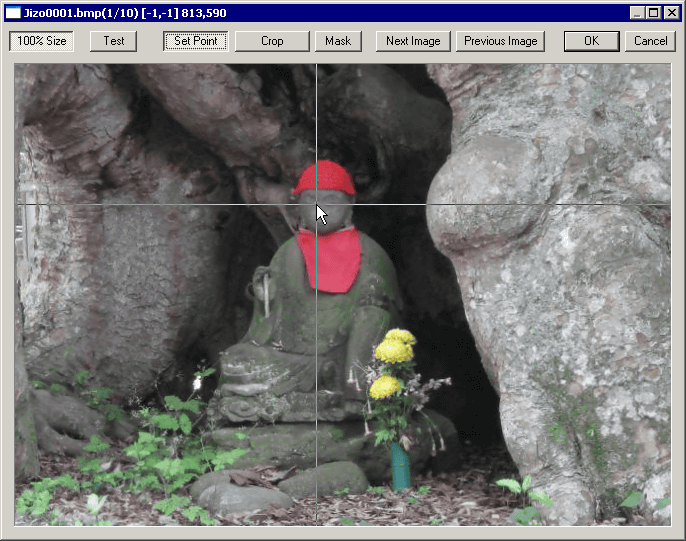
The 'Common corresponding points'are indicated by the intersection of the red lines.
Press '100% Size' to exit that display mode.
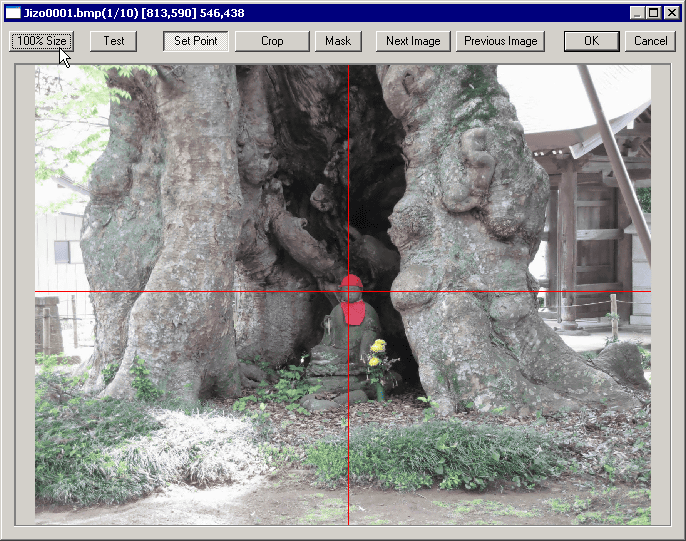
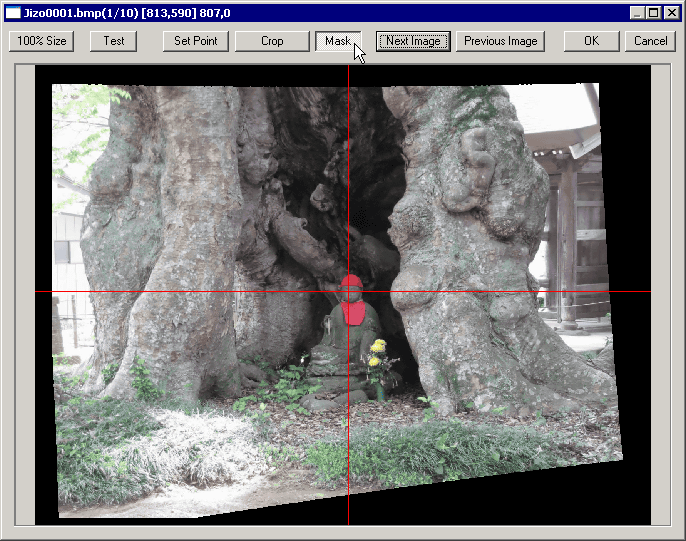
The second step is to specify the cropping area.
Push the 'Mask' button to create the masks that define the area common to each image.
The title-bar will indicate the progress of the mask creation.
Push the 'Crop' button and specify the cropping area with mouse-drag.
If you make a mistake, just repeat the operation.
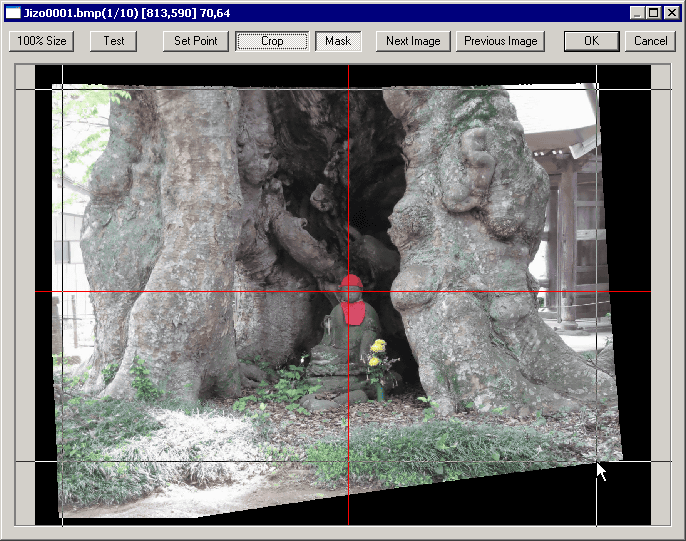
The crop area will be outlined in red.
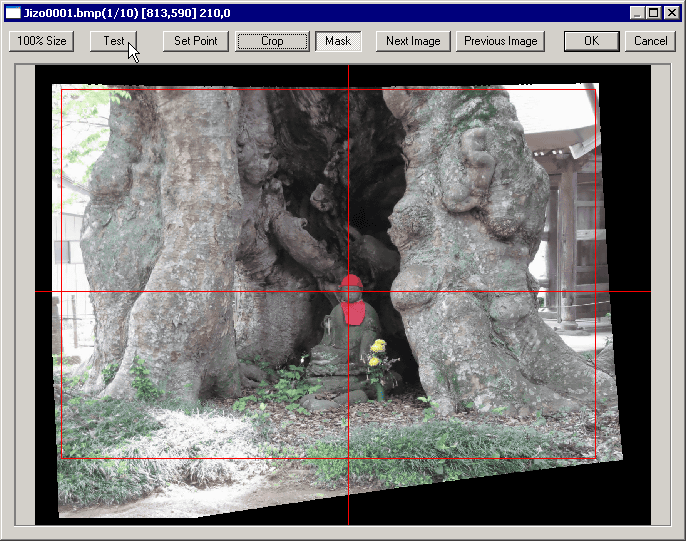
Pressing 'Test' will toggle an animation on/off of that shows the result of cropping and X/Y adjustment.
Push 'Test' button to stop test mode.
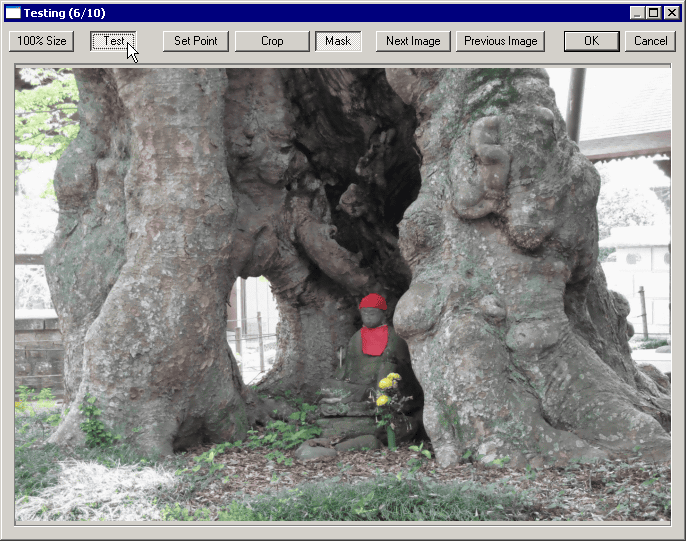
Then, push 'OK' to save the resulting images.
SPM will indicate the number of images that will be saved and the folder that they will be saved to.
After you confirm this, the images will be adjusted, cropped and saved and the saving progress indicated.
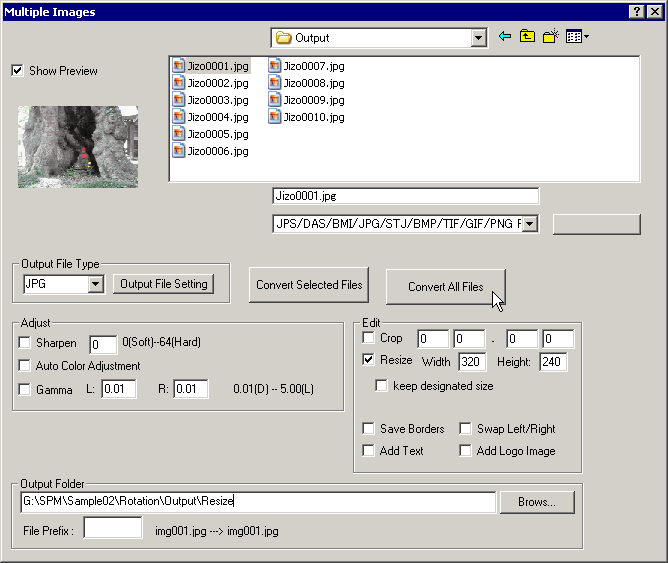
If you want to resize,sharpen, etc..., you can use Menu->File->Multiple Images->Other multi job.
Choose options,then push convert button.